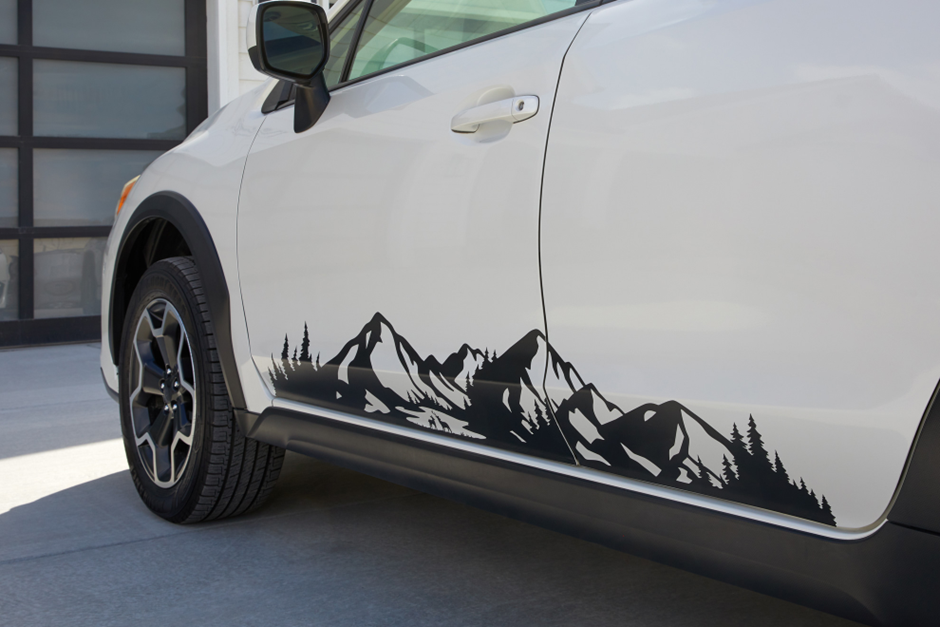
If you love to collect various cars in your garage, then how to make car decals with Cricut must be on your list. To expose the car on the roads, they are placed all over, showing off the supplies used in it. Before drawing the design, everyone must know the material type and utilize them while renovating the car.
However, it is a beginner-friendly project which can be learned easily. Once everyone learns about decorating a car with one of these cutting machine vehicles, they can create small and big projects. We hope that this blog will serve you with all the stages revolving around it.
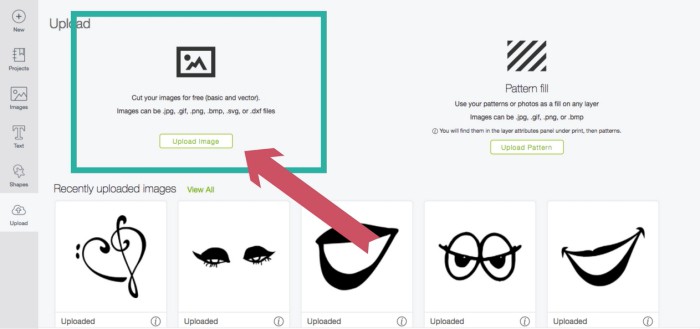
Stage 1: Add Image to the Design Space App
- Firstly, open the app and Sign In by entering your Cricut ID by choosing New Project or New box.
- Then, tap the Upload option mentioned on the bottom-left side of the panel.
- After that, press the Upload Image mentioned on the new web page.
- You will be inquired to choose the image type under the Select Image Type category.
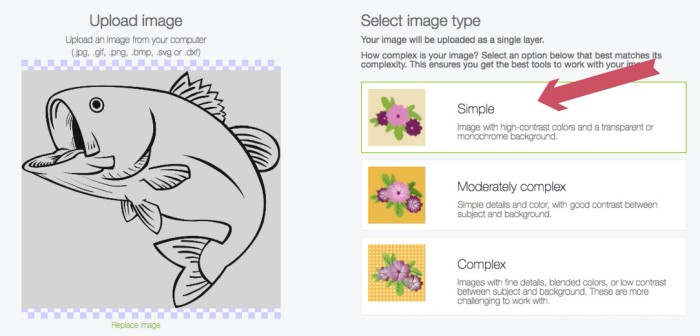
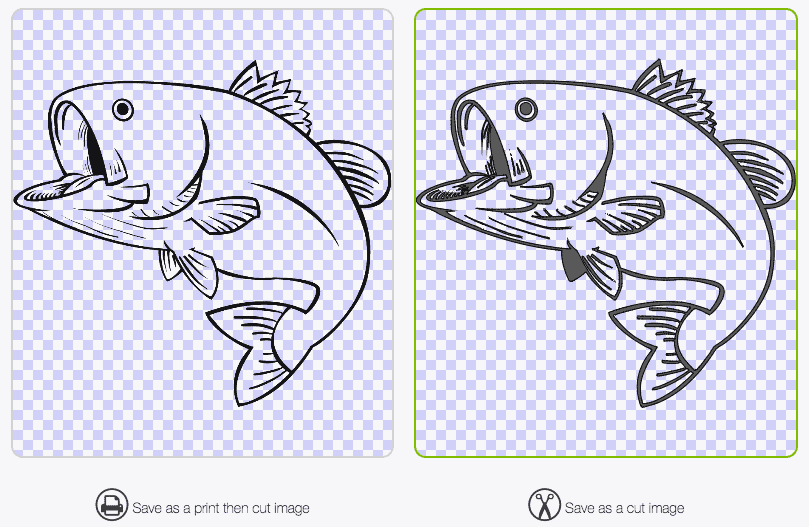
- Next, choose the area which will not be part of the final cut. Ensure that the area you choose should be white.
- Once it is done, choose the image as a Cut Image. Then it’ll give you a preview of the cut-down image.
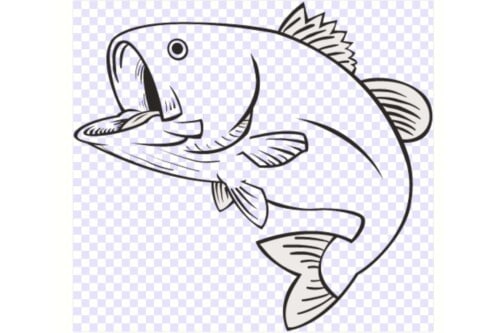
- Tap the Back box to modify the image before taking a step to the next step.
- Besides, approving the final design will redirect you to the original upload screen.
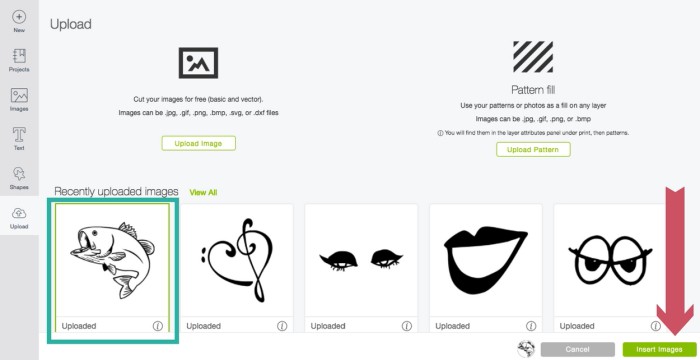
- Currently, the image will be available under the Recent Uploads section.
Stage 2: Cut Down Design on Cricut
- Furthermore, tick the edited image mentioned under the Recently Uploaded Image section.
- Tap the Insert Images and select the Make It box to cut the image out of Premium Glossy Vinyl.
Stage 3: Prepare the Cricut Design Space
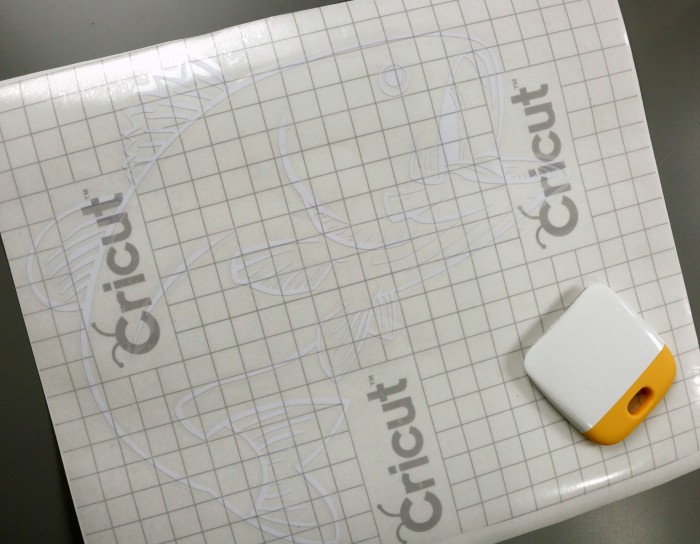
- In addition, once the image is cut down, weed out or remove the extra vinyl.
- Equally important, take a small amount of Transfer Tape, helping you in avoiding the vinyl from its place.
Stage 4: Apply the Decal
- Next, you are instructed to clean the area with glass cleaner slowly and properly.
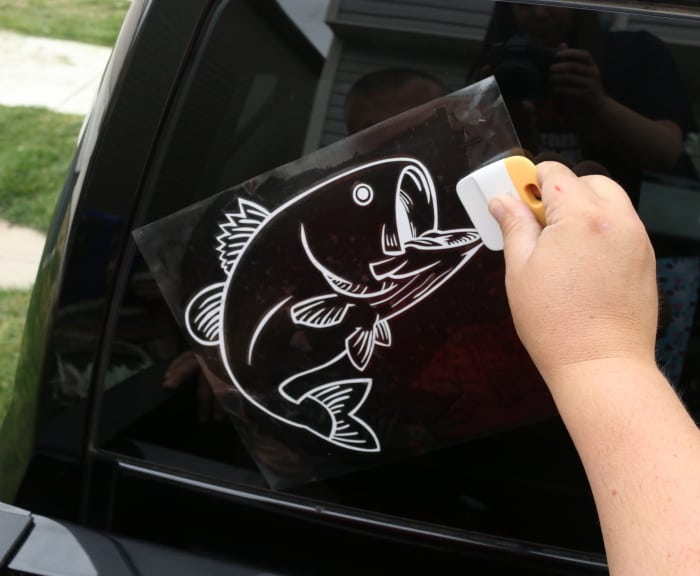
- Gently peel back the adhesive vinyl backing paper to the whole image parts released from it.
- Lay down the material by applying it from one end of the corner in a rolling motion across the surface.

- Take the scraper tool and remove any bubbles visible inside the car decal.
- After doing so, slowly hand peel back the Transfer Tape, and you go.
- Woohoo! Your car will now look much cooler as compared to older times.
Conclusion
On the whole post, it can be anticipated that you must have gotten the correct ratio of the primary details. However, to stick the custom decal on the car, you must follow each stage without skipping any of them. Through the process, you’ll be eligible to get a top-quality product and the chance to show off in front of your friends. Moreover, you can contact us for any query or stay tuned with the FAQs below.
Frequently Asked Questions
Question: What Materials/Tools to Use for Car Decals Cricut?
Intending to finish how to make car decals with Cricut work, all the users must know about the total materials used to create the craft. The list of essential supplies includes:
- Cricut cutting machine.
- StandardGrip Transfer Tape.
- Painter’s Tape.
- SVG/PDF/DXF free car decals designs.
Followed by this, a variety of tools that will help in making the design much glossier and attractive are as follows:
- StandardGrip Machine Mat-Green.
- Weeding Tool, Scraper Tool, Scissors, and many more.
- Specific fonts as per choice.
- Rubbing Alcohol.
- Lint-free paper towel.
Question: What is the Difference Between Cricut Decal Paper & Sticker Paper?
Answer: Decals are created for outdoor purposes and are more durable than stickers. Depending upon the item type, it may last longer for at least seven years. However, sticker paper is durable for indoor purposes and doesn’t last long, half as compared to decal paper. Moreover, the decals are stuck on any surface, but decals are mostly stuck on larger formats.
Question: What are Primary Decal Instructions to Follow During the Process?
Answer: Some of the primary Decla instructions that the user must keep in mind while creating the design are as follows:
- Ensure that your surface is clean and free from dust or oil. The respective area should be wiped down with rubbing alcohol products.
- Do not use any cleaners instead of alcohol, as they leave a residue.
- After removing the white backing paper, your decal will be ready to apply on the surface.